Names of the buttons in the Tool Box
 |
| Measure |
| Add |
| Discard |
| Display
Preferences |
|
|
| Adding
Preferences |
| Advancing
Polygonal Shapes |
| Pick Up |
| Select All |
| Operation on
Selected Objects |
|
|
 |
| Edition Tools |
| Cabinet |
| Recycle |
| Bring to Front |
|
|
| Print the
Floor Plan |
|
|
| Reverse All |
| Group Objects |
|
|
 |
| Scene
Specifications |
| Object
Information |
| Refresh |
| Send to Back |
|
|
| 3D |
|
| Pointer |
| Unselect All |
| Select by Area |
|
3. Creating a Typical Kitchen
The following chapter covers all the steps required to create a typical kitchen. As needed, you can refer to the basic chapters 1 and 2, the Reference Guide or the Tutorial for additional information regarding a tool or a function of the Scene Editor.
First, open the Scene Editor program to display the Main window.
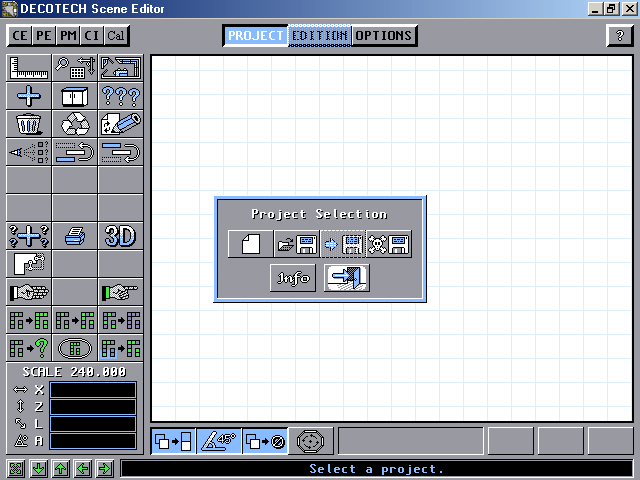
Figure 3.1: Scene Editor Main Window
The Project mode is active by default.
3.1 Creating a New Scene
The Project Selection dialog box opens in the work area.
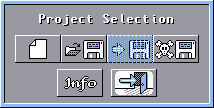
Figure 3.2: Project Selection Dialog Box
The first steps involve creating a new scene by assigning it a file name, which will be stored in memory.
 Select the New button to begin a new project. The New Scene dialog box appears on the screen.
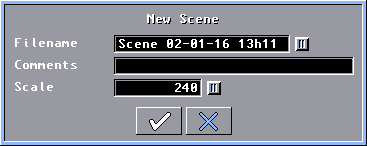
Figure 3.3: New Scene Dialog Box
1. In the File Name text box, a scene name is displayed by default: Scene/Date/Time. Keep this file name for the moment.
Note: You can close the editor at any time by clicking on
Project and then on the Exit button. 
2. In the Scale text box, 240 appears by default. This indicates that your work area, which represents the floor plan, is divided into 240 1-inch units. The real width of your floor plan is thus equal to 20 feet. For the assembly of your kitchen, maintain this default value and click the
OK button.
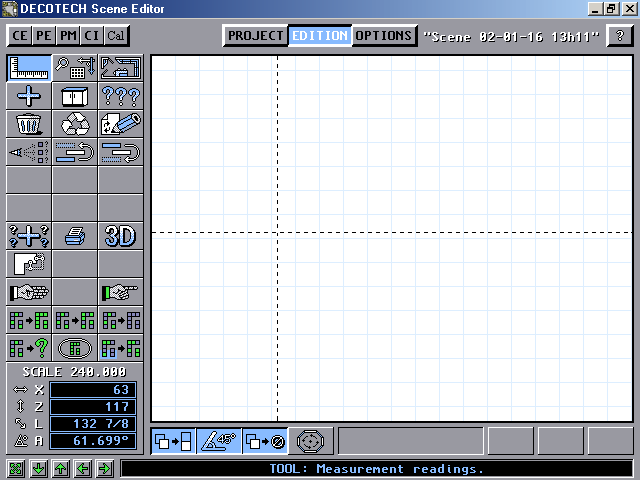
Figure 3.4: Work Area with Cross Pointer
The Scene Editor now switches from the Project mode to the Edition mode. The cross pointer (two perpendicular dotted lines) now appears in the work area. You are now ready to begin designing a new kitchen.
But before you proceed with the creation of a typical kitchen, let's see the Scene Editor basic functions.
3.2 Getting Familiar with Basic Tools
The most common tools used when creating a scene are:
1.  Snap button (F1)
2.  Pick-Up button (F7)
3.  Grip-Point button (Shift)
4.  Rotation button (Alt)
5.  Multi-Adds button (Ctrl)
3.2.1 Snap Tool (F1)
 This button is used to ensure that subsequently added objects will automatically be aligned to the overlapped object.
In order to snap an object adequately, it has to be gripped by a specific point. The nine (9) grip points of an object are located in its center, its corners and the middle of its sides. E.g.

To use the Snap tool:
1. Make sure the Snap button is active.
 In the tool box, click the Add button to open the Type of Object to Add dialog box.
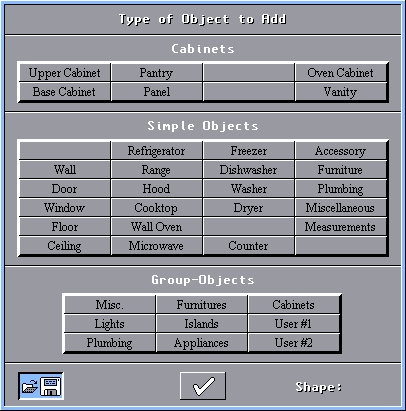
Figure 3.5: Type of Object to Add Dialog Box
2. Click the Refrigerator button and, from the corresponding dialog box, select the default model.
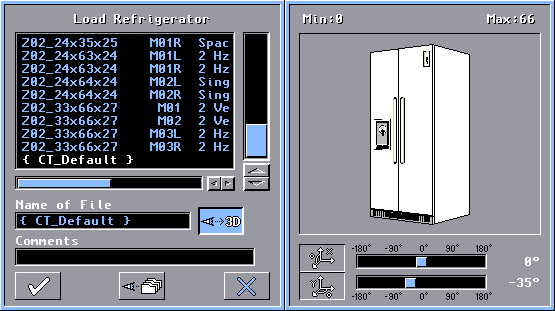
Figure 3.6: Load Refrigerator Dialog Box
3. Click OK to confirm. In the work area, click the left mouse button to put the refrigerator in place.
4. To place another refrigerator to the right of the first one. Repeat step 1 and step 2, and then jump to step 5.
5. As you can see, the default grip point of the object is the left upper corner. In order to put the second object right beside the first one, without leaving a free space in between, make sure the second object
overlaps the inside right back corner of the first one.
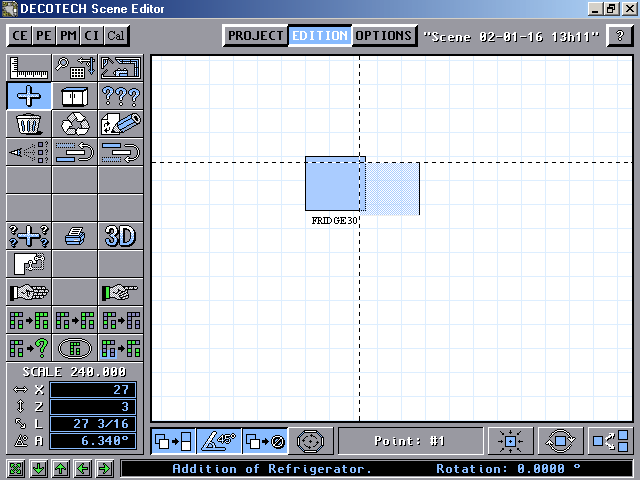
Figure 3.7: Snapping an object to another one already in place
6. Click the left mouse button to put the second refrigerator in place.
Note: If you click the second refrigerator to much inside the first one, there will be an intersection detected and the addition will be denied.
Now, lets see the 3D perspective.
 In the tool box, click the 3D button to open the 3D Perspective dialog box.
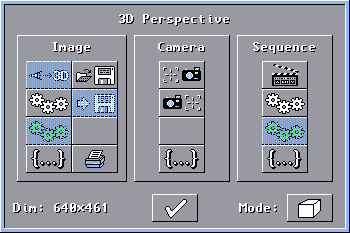
Figure 3.8: 3D Perspective Dialog Box
 In the Image section, Click the
Execute button and the refrigerators will be displayed in 3D. In the Image section, Click the
Execute button and the refrigerators will be displayed in 3D.
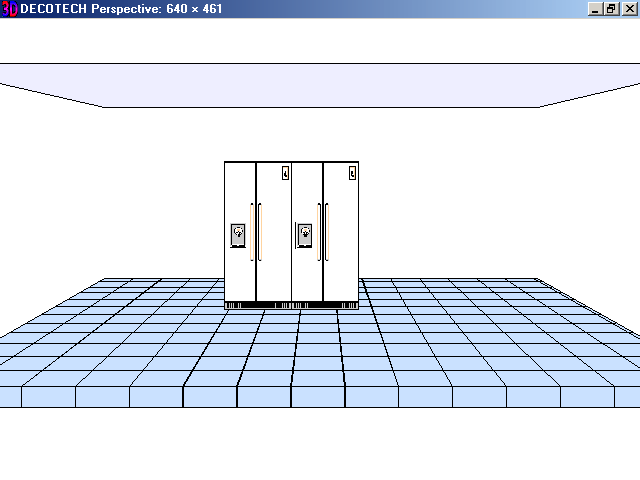
Figure 3.9: 2-Refrigerators in 3D
You can see that the second refrigerator is right beside the first one, with no free space in between. Click anywhere in the 3D window to return to the work area.
3.2.2 Pick-Up Button (F7)
 This button is used to grab an object and drag it to another position in the work area.
Once the Pick-Up button is active, an object can be repositioned by clicking it, moving it with the mouse and clicking again.
To use the Pick-Up tool:
1. In the tool box, click the Pick-Up button.
2. Grab the second refrigerator by positioning the cross pointer on its upper left corner and click the left mouse button.
3. Drag it anywhere in the work area and click again. The object is now in place.
As you know, an object can be grabbed by any of its 9 grip points (See figure 3.5). Use the
Pick-Up tool and practice yourself by gripping the object on its center, right lower corner, etc. Then, put it back beside the first refrigerator.
3.2.3 Grip Point Button ( SHIFT )
 This button can be used to change the grip point of an object when placing it into the scene.
To use the Grip-Point tool:
1. Using the Pick-Up tool, click the second refrigerator on its upper left corner. Three buttons now appear at the left corner of the screen.
2. Click the Grip-Point button (SHIFT). You can see that the default grip point is the left upper corner of the refrigerator. The additional information box at the bottom of the screen indicates Point:#1.
3. Press the left mouse button to change the grip point (clockwise) and read the position in the additional information box: Center.
4. Press the left mouse button as many times as needed to see the nine different grip points and return to the first position (left upper corner).
5. Then, press the right mouse button (counterclockwise) and notice the change of direction. Press the right mouse button as many times as needed to return to the first position (left upper corner).
6. Click the SHIFT button to deactivate the Grip-Point tool and put back the refrigerator into place (beside the first one).
Note: If you don't deactivate the
Grip-Point tool before placing the object, you will loose the grip point previously set.
3.2.4 Rotation Button (Alt)
 This button can be used to rotate an object when placing it into the scene.
To use the Rotation tool:
1. Using the Pick-Up tool, click the second refrigerator on its upper left corner. Three buttons now appear at the left corner of the screen.
2. Click the Rotation button (ALT). You can see that the grip point of the refrigerator is the left upper corner, as you had left it previously, and the object has a white line at the bottom indicating its front side. The additional information box at the bottom of the screen indicates Point:#1 and the status line shows Rotation: 0.0000°.
3. Press the left mouse button to change the rotation and read the angle in the status line (-22.5000°). The left mouse button moves the object to an angle of -22.5000°.
4. Press the left mouse button as many times as needed to see the 16 different angles and return to the first angle (Rotation: 0.0000°).
5. Then, press the right mouse button and notice the change of rotation (Rotation: 90.0000°). The right mouse button moves the object to an angle of 90.0000°.
6. Press the right mouse button as many times as needed to see the four different angles and return to the first angle (Rotation: 0.0000°).
7. Click the ALT button to deactivate the Rotation tool and put back the refrigerator into place (beside the first one).
Note: If you don't deactivate the
Rotation tool before placing the object, you will loose the angle previously set.
3.2.5 Multi-Adds Button ( CTRL )
 This button is used to place several copies of the same object in the scene.
To use the Multi-Adds tool:
1. Follow steps 1 and 2 of Section 3.2.1 to add refrigerators to the scene.
2. Back to the work area, before placing the first refrigerator, click the
Multi-Adds button (CTRL) at the bottom of the screen.
3. Click the left mouse button to place the refrigerator anywhere in the scene. Drag the mouse and put another beside this one and so on. You can place as many copies as you wish.
4. Click the Measure button to deactivate the Add tool.
5. To erase all these refrigerators, click the Discard button (Trashcan) and click once on each of these copies.
Now that you are familiar with Scene Editor's basic tools, let's create your first kitchen layout.
To continue the Step by Step guide:
Open the Scene Editor program and Click on the Question Mark button located on the top right of the screen.

The "Available help" window opens. Click on the "Open
the guide now..." button.

The Scene Editor User's Guide opens.
Click on the Contents button. 
Near chapter "3 Creating a typical Kitchen",
click on the line
"3.3 Creating a Kitchen Layout".
Use the Right Arrow button to travel through the guide. 
|

![]()
![]()
